By ALDONA BIRD
Newsroom@DominionPost.com
With beautiful autumn weather beginning, and with COVID-19 cases continuing to rise in our state, it is a great time to socialize outdoors.
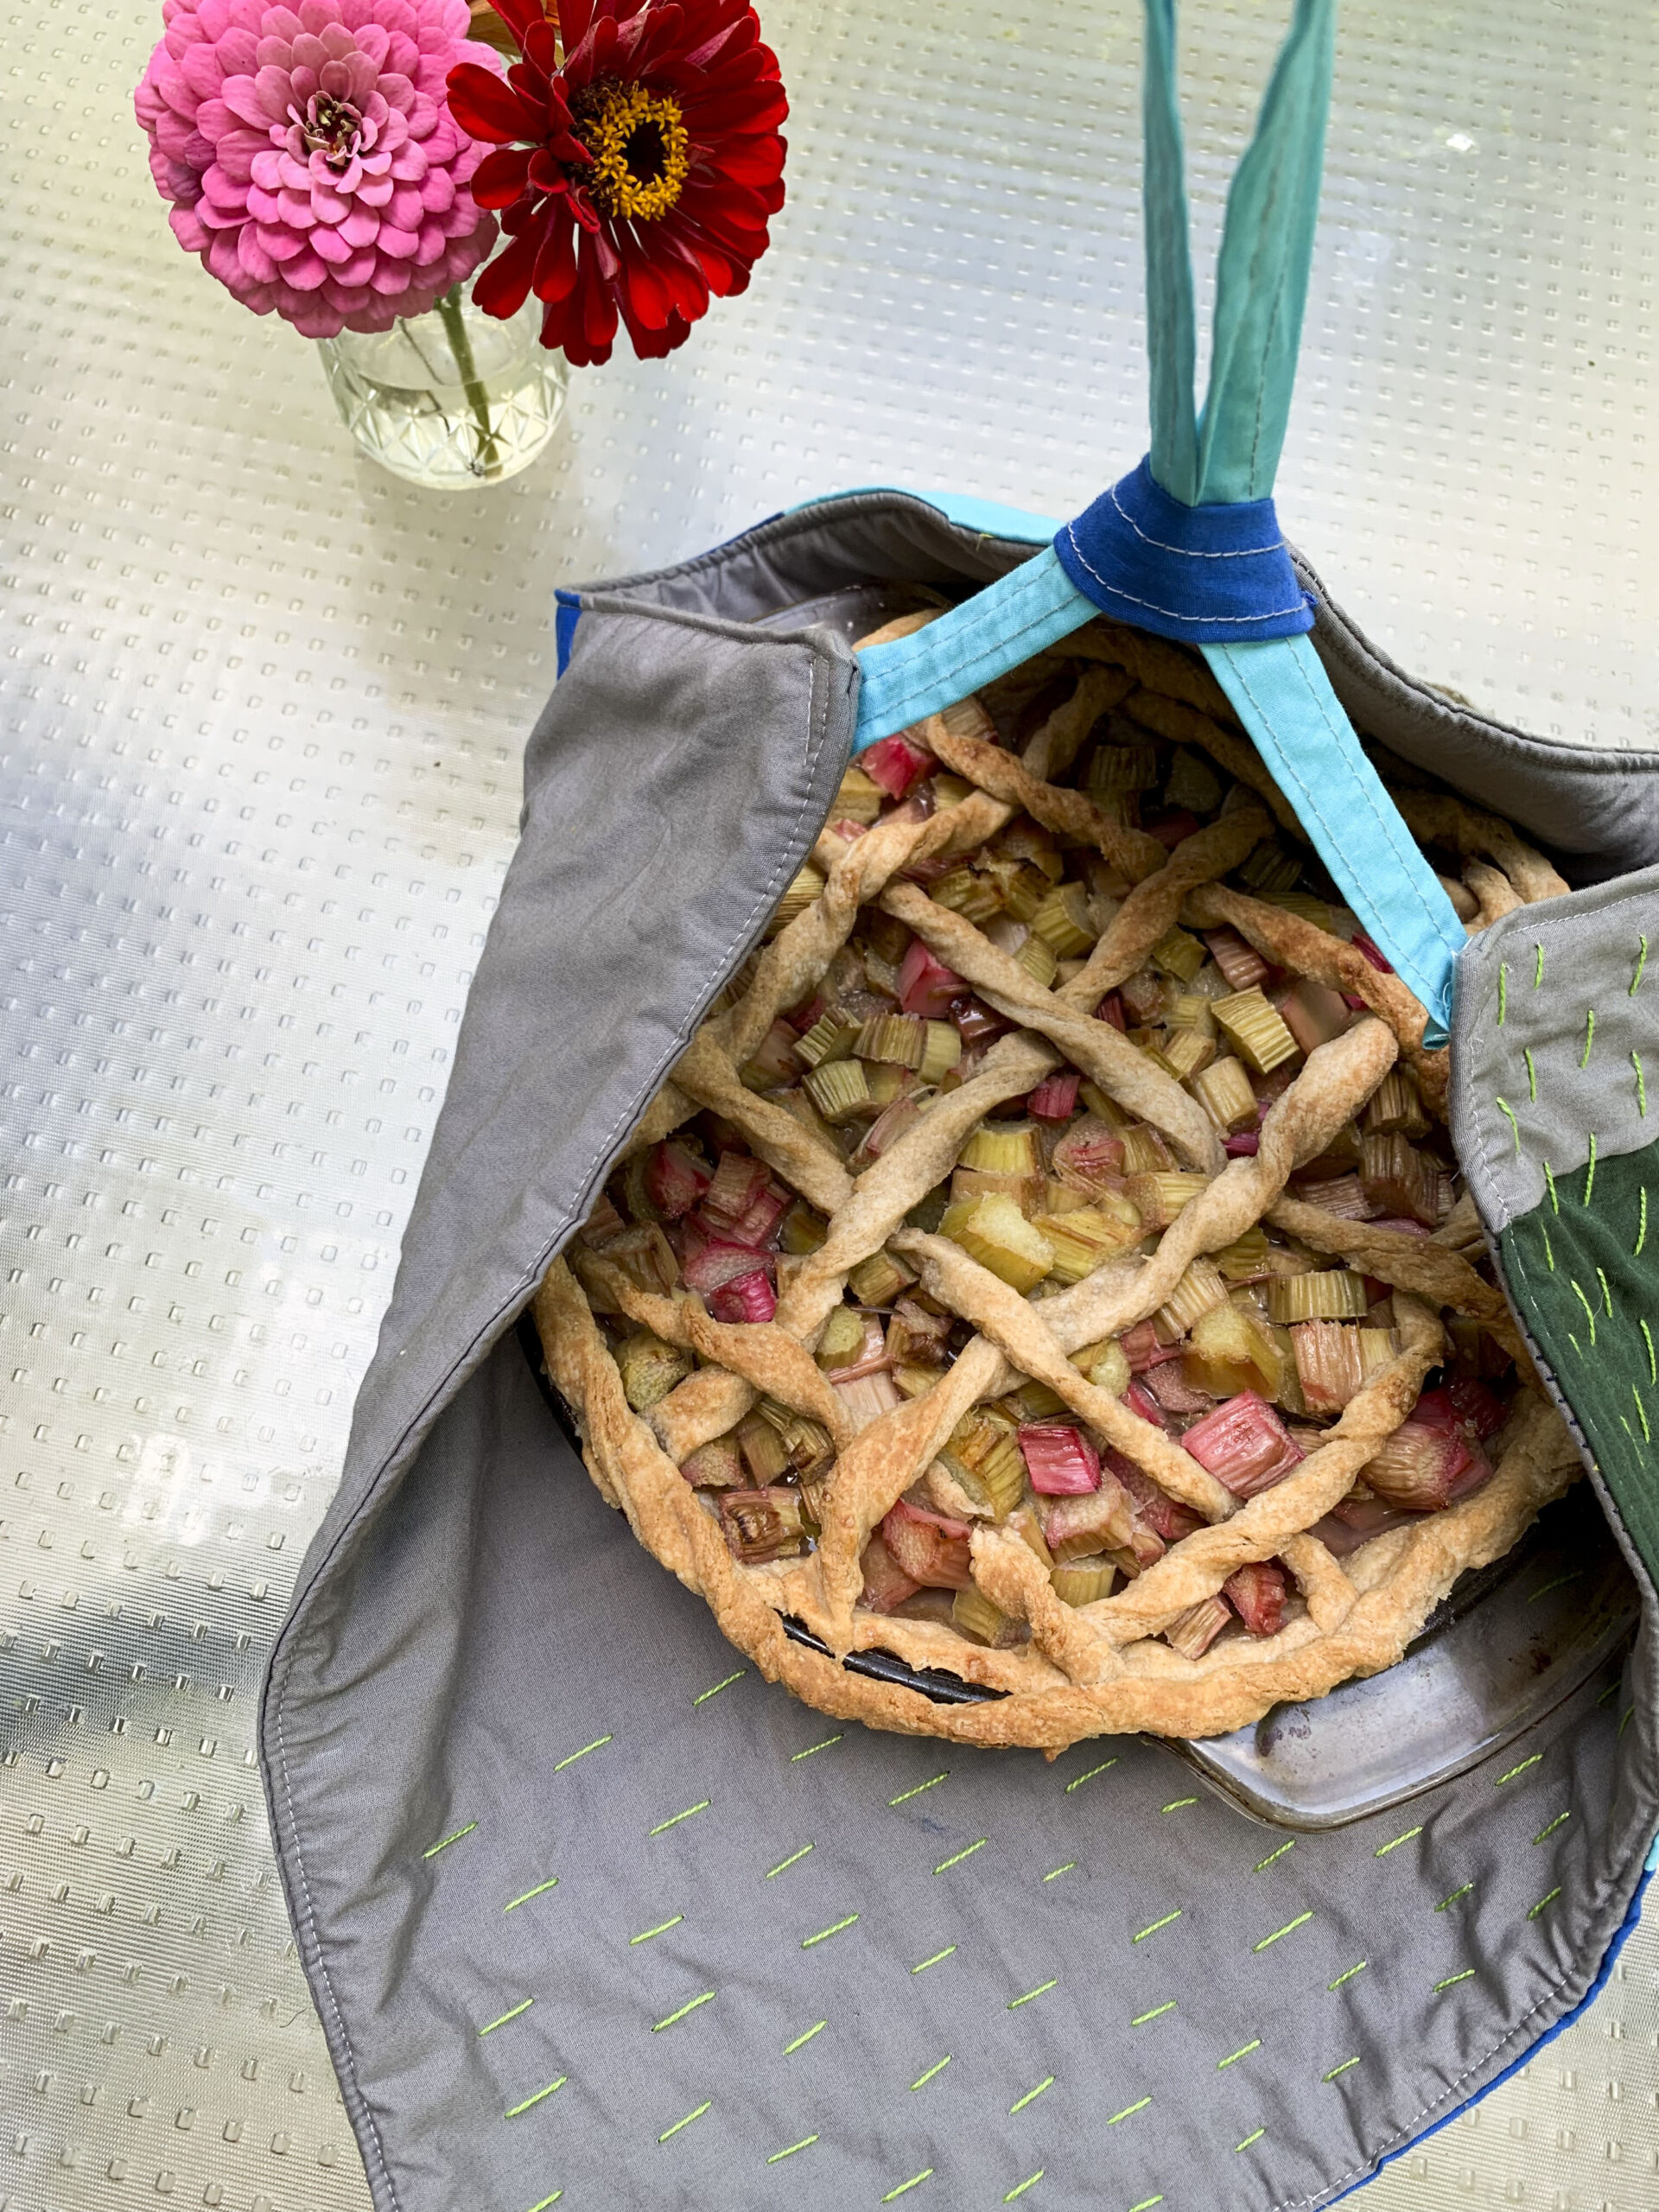
Whether attending a potluck or taking a baked treat to enjoy on a friend or family member’s porch, carrying pans of food can always be tricky particularly if you want to keep them warm.
To solve the awkwardness of juggling multiple hot dishes you can make yourself a simple dish carrier with some fabric scraps and a few minutes of sewing.
To make a DIY dish carrier, you will need:
- Non-stretch fabric, plus inter-lining material
- Scissors
- Sewing machine or needle and thread
First pick your fabrics. You will need inner and outer fabrics, plus an inter-lining (especially if you want to make a carrier which can keep dishes warm).
You can use the same material for the inner and outer layers, of you can combine fabrics — even consider piecing scraps together for a quilted look. This also makes use of smaller bits of fabric in your scrap bin.
The inter-lining fabric can be terrycloth or part of an old sweater. Anything warm and cozy will do.
Cut a square out of all three fabrics. Determine the size of the square by the type of dish you take to potlucks most often, or make multiple carriers of different sizes.
For a standard pie dish, the square you cut should be about 18-by-18 inches. Cut it smaller if you want to make a carrier that has airflow. Larger and the access fabric may get in the way.
If you are piecing the inner or outer layers out of smaller scraps, sew them together and then cut to the size square you are making. Sewing straight lines for piecing is easiest for those who have not done much of this type of sewing before.
Consider sewing rectangles and triangles together to make a collage that you find aesthetically pleasing.
Pin the bottom layer and the lining fabric together. This is particularly important if you are upcycling an old sweater for the inter-lining, so it does not stretch.
Pin and sew the top layer to the bottom layer, with right sides facing. Leave a few inches unsewn along one edge.
Through the gap turn the square right side out. Top stitch along the edges.
Cut two rectangles about two inches wide by 12-16 inches long. Sew them both into tubes by folding them lengthwise and stitching with the wrong fabric side out. Turn them right side out, and top stitch down both edges.
Cut one of the stitched rectangles in half. Fold both halves into loops, and sew to opposite corners of the square tucking the ends under so they don’t show.
Sew either end of the other stitched tube to the other opposite corners, again tucking the ends. Be sure to stitch this cross piece and the loops very securely to the corners of the carrier.
By hand or machine you can add decorative stitches. Quilt (if doing so by machine do so before you add the loops and cross piece), embroider or add other decorations.
To use the carrier, place dish inside, and thread the cross piece through both loops, and carry by the handle this creates.
TWEET @DominionPostWV


